
Taking a screenshot on a PC and laptop is easy. But it can be done more effectively. I will show you the 4 best ways to screenshot quickly and easily. You can use these handy screenshot methods to prepare your schoolwork, presentations, or preparing blogging content (like me).
How to take screenshots on laptop easily
- On Windows, use keyboard shortcuts PrtScn
- Use Windows’ Snipping Tool
- Use Windows’ Snip & Sketch
- Use Snipaste (the best method!)
Keyboard Shortcut Key “PrtScn”
Windows keyboard shortcuts, PrtScn or PrintScreen are the fastest way to take screenshots on a laptop. Certain models may need to use Windows Logo Key + PrtScn button.
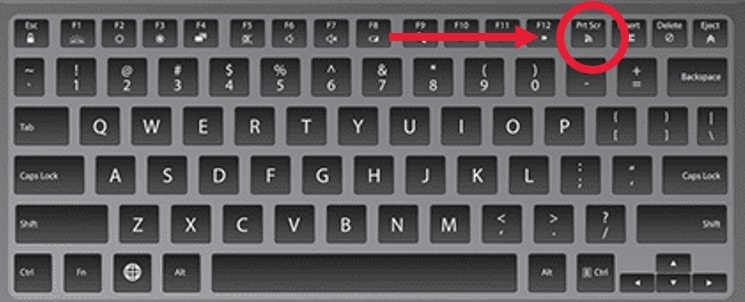
Although each laptop model has a slightly different keyboard layout, most of the time PrtScn key should be located at the upper right section of the keyboard.
After that, you can use Ctrl+V to paste into any documents ( MS Word, Powerpoint, Paint etc)
Snipping Tool
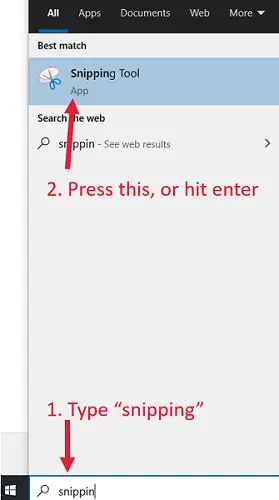
- Press Windows Logo Key , type Snipping tool, and then select it in the search results.
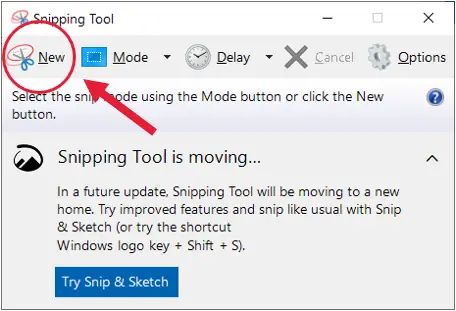
- Snipping tools windows pop up. Click on “New” and you can drag the mouse cursor to select the area you want to capture.
- You can paste the image into any documents or save it as a photo file (JPEG or PNG)
Snip & Sketch
- Press Shift + Windows Logo Key + S. The “Snip & Sketch” tools will immediately overlay your current laptop screen.
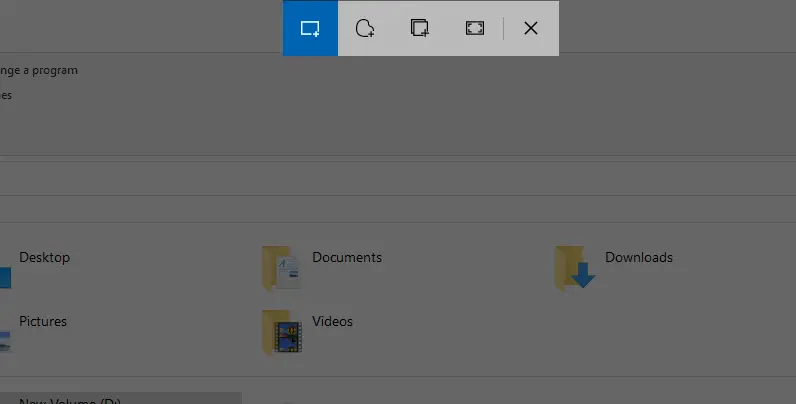
- Then, you will see 4 snipping options: rectangular snip, freeform snip, windows snip and fullscreen snip. You’re ready to capture the area you need.
- Freeform snip is unique and convenient when you want to capture an odd-shaped image.
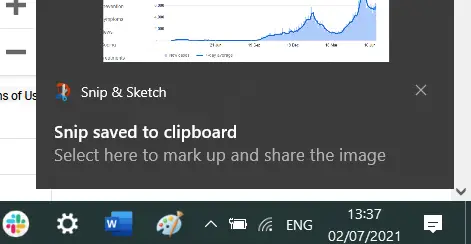
- The screenshot captured is automatically stored in the clipboard as shown below. There’s a pop-up notification at the bottom right where the Windows notification centre is.
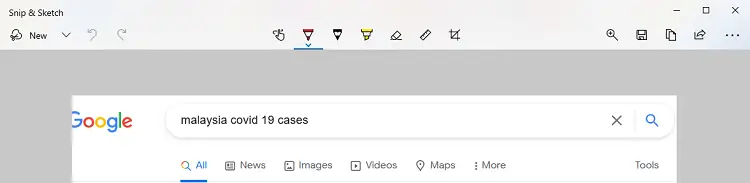
- If you need to mark up the image, just click on the pop-up notification. It will bring you into a annotate interface.
- Then, you can start to remark, highlight and sketch on the screenshot.
- You’re ready to paste it into any documents.
Snipaste
Snipaste is the only third-party screenshot tool that I think is worth installing.
Previously, I have tried Snagit. Snagit is very powerful and packs tons of features.
But, trust me, Snipaste is way more convenient and quick when it comes to taking screenshots fast and accurately.
- Go to Snipaste.com, download the version compatible with your operating system. There are versions for Windows 32-bit, 64-bit, and also macOS.
- Install the program and run it for the first time.
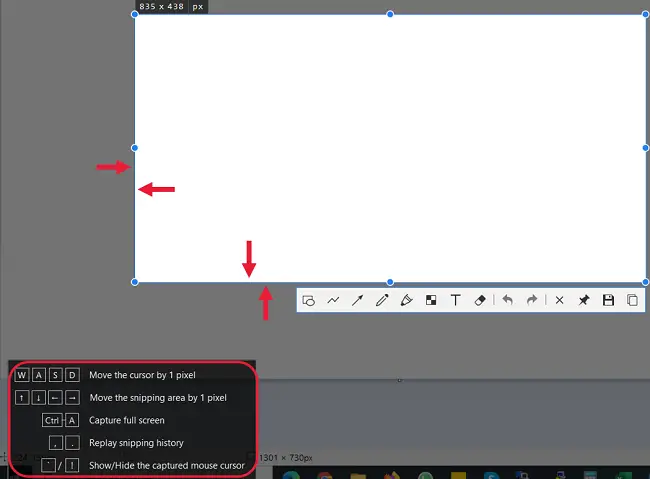
- Snipaste uses the F1 key as a shortcut key to take a screenshot.
- Press F1, drag and select the area you wish to capture. After you have selected the area, it is not done yet. It lets you fine-tune the screenshot area so that the screenshot can be pixel-perfect.
- Still not blown away? After that, you can do markup with its built-in annotation tools. It has shapes, lines, arrows, pencil, marker pen, mosaic, text and eraser. These are the most complete, easiest and practical annotate tools I have ever come across on a screenshot tool.
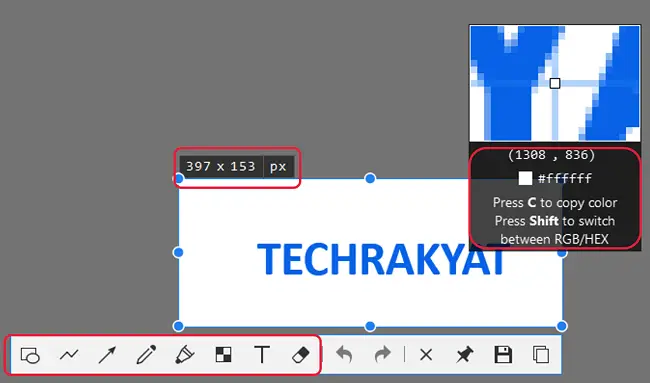
- That’s not all, move the cursor, you notice that you can get the RGB/HEX colour code of any pixel on the screen. Super, super handy for content creators and web developers!
- After you finish everything and satisfy with the screenshot, press Ctrl + C to copy to clipboard or Ctrl +S to save it as photo files.
- Wait… Snipaste still has a cool trick up its sleeves. Press F3 will let you pin the screenshot that you have just captured and keep it always stay on top of other programs. It is very convenient when you’re doing references and research.
Before I discovered Snipaste, I used to use Windows snipping tools a lot. The fact that Snipaste saves me so much time and energy makes me want to write about it.
Because it is so helpful, I really wish everyone should try this hidden gem of a screenshot tool.
If you think this article is helpful, please share it with others. And comment below if you wish to learn more about the daily tools that I personally use.
I use my favourite software-screenhunter. But good sharing nonetheless.
try out Snipaste… it’s really good~~~